Have you ever had this thought after staring at a jacket, backpack, or hat?
“Wow, the patch looks cool.”
How did it get there?
Those little embroidered wonders aren’t magic, but they’re designed with a mix of creativity, skill, and some serious attention to detail. Starting from the first sketch on paper to the last colourful threads, every patch has its own story to tell. Some may look quirky, some look bold, and some are downright hilarious.
And the best Part? You can make your own, showcasing your personality, brand, or even your sense of humour.
Do you know?
Embroidered patches have been around for hundreds of years.
They started with military uniforms and royal garments. Now? They’re everywhere, from kids’ backpacks to biker jackets. So, in this blog, we will learn how these patches are designed and see all the important steps and details.
Steps for Creating Custom Embroidered Patches
You must be wondering how these amazing small badges are created, so worry not. In this section, we will explain the details that will help you create custom embroidered patches.
Step 1: Sketching the Idea
So, every patch starts with some rough idea. Someone just grabs their pencil and starts sketching. Don’t worry if it turns out to be something weird in the beginning. The best patches started as messy and funny sketches on a notebook or a napkin.
Designers talk about it as:
- Size and Shape
You can keep round, square, or star-shaped.
- Colors
You can opt for bright or pastels.
- Style
Plenty of options like classic, bold, iconic, or cartoonish
Do you know?
Adding a tiny detail, like a smiling taco or a small spaceship, makes patches instantly more fun and memorable.
Some people even say designing patches is like a mini game of “what fits in a 2-inch circle?” And honestly, it is.
Step 2: Turning Your Sketch into a Patch File
Once the sketch looks good, it’s time for a little magic called digitising. This means turning your drawing into a file that is readable by an embroidery machine. Consider it like teaching a robot how to draw with threads and not with a pencil.
Let’s have a look at some ways:
It is like sending your doodle on a small spaceship and telling it exactly where each thread should go.
Designers choose stitch types, such as straight lines, satin stitches, or fill stitches. Each one gives the patch a different look. Some pop out, some stay flat, and some feel extra fancy.
Do you know?
A single patch can have thousands of tiny stitches.
Yes, thousands of stitches. Your patch is secretly way more complicated than your average sweater.
And just like that, your weird little doodle starts looking like a real patch that could go on a jacket, backpack, or hat.
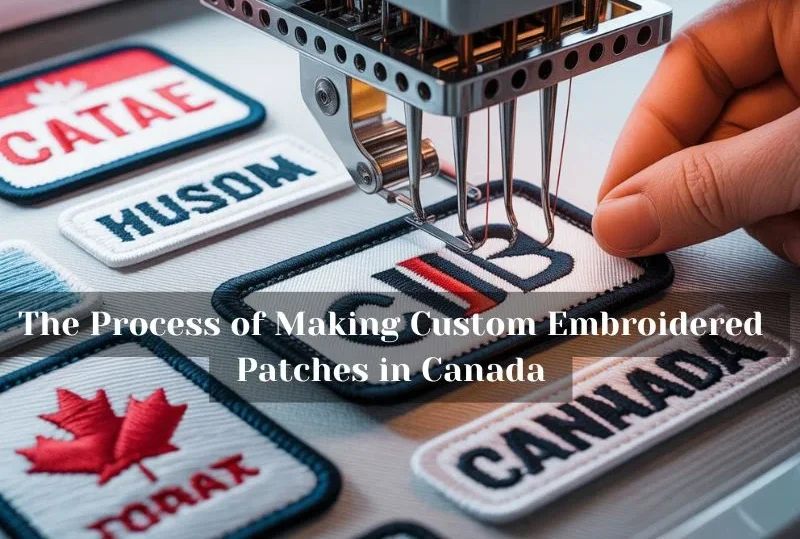
Step 3: The Embroidery Machine Does Its Thing
The fun part is that the machine actually stitches your badge. Suppose a robot is doing short and precise dance moves with some colourful threads. Does this sound boring? Not at all, this is mesmerising. You can literally watch your design slowly appear.
Here’s a funny Part
“Why did the thread break up with the needle? It felt too tied down!
The machine follows the file from the last step, switching colours, stitching patterns, and sometimes going so fast it’s almost hypnotic. Big patches might take hours, tiny ones just a few minutes. Although humans still need to check everything looks right and trim all the messy threads.
Do you know?
Modern embroidery machines can handle different colours at the same time. Some even handle 15 colours in one go. It is like a lot of rainbow power packed in a small patch.
Finally, your patch has gone from a simple sketch to a full, colourful one covered in thread and ready to stick anywhere.
Step 4: Quality Check and Finishing Touches
So, the patch is stitched finally, but we are not done yet. Here are the finishing touches, which means:
-
Trimming extra threads
This is because messy threads are a no-go.
-
Adding the backing
This includes iron-on, velcro, or plain sew-on, on how you want to stick it.
-
Quality Check
Someone actually looks at it to ensure that it doesn’t look like a tangled mess.
Do you know?
A quality patch can last longer, even after dozens of washes. That patch you designed is now immortal.
Tip: Don’t be afraid to add tiny details at this stage, like extra color highlights or a fun border. Those little things make your patch pop and feel special. You can also ask any service provider, such as CanadaPatches.ca, for expert help and guidance with design.
Why People Love Custom Embroidered Patches
Okay, let’s be honest that there’s something just fun about patches. You can slap them on a jacket, backpack, or hat and instantly show a bit of your personality. They act like small billboards for your style or maybe your weird sense of humor.
Some people like to collect them, some trade them, and some want to keep a patch that says,
“Yes, this is me.”
The best part is that custom patches allow you to design something that truly belongs to you. You can create it quirky, cute, bold, or ridiculous. There is no one to stop you from doing this.
Fact: Patches are famous in several communities, as clubs, sports, teams, gamers, and even some companies use them to show their pride. In short, everyone wants a small patch of honor, even if it’s small.
So yes, no matter if you are making it for fun, for the team, or for your business, patches are always cooler than you may think. On the other hand, designing them is magical to watch, from sketch to the final masterpiece.
Wrapping Up “Embroidered”
So, this was all about custom patches. They are not just small pieces of fabric but are small works of art, full of personality, color, and a bit of magic. From your first messy sketch to the machine stitching every thread, and finally adding the finishing touches, each patch has its own story.
The best part? You get to make something that’s truly yours. Funny, bold, cute, or weird, it doesn’t matter. If it makes you smile, it’s perfect.
Think of patches like tiny mood boosters on your jacket or backpack. They stick, they pop, and they show the world a piece of your style. So, next time you see a cool patch, remember that someone has sketched it, digitised it, stitched it, trimmed it, checked it, and made it last.